


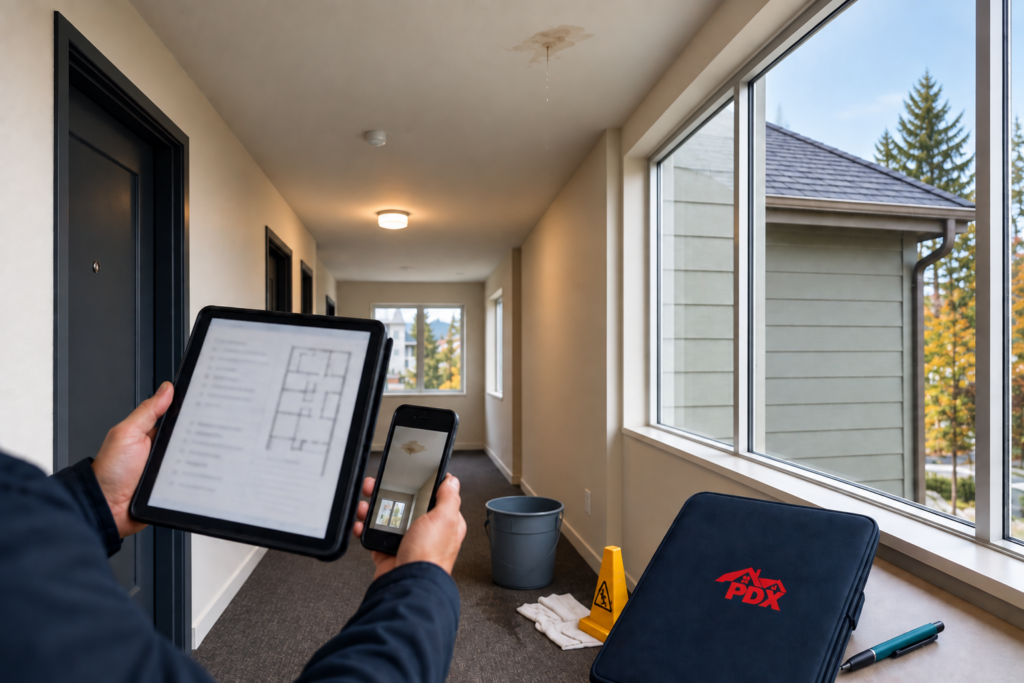
Why Multi-Unit Roof Leak Triage Needs a Clear Workflow
For multi-unit property managers, a roof leak is not just a maintenance ticket. It can affect tenants, common areas, interior finishes, electrical systems, siding, insulation, and the long-term performance of the building envelope.
A structured triage workflow helps you respond calmly, prioritize risk, document conditions, and coordinate with a qualified Portland roofing contractor. The goal is not to guess the source of the leak. The goal is to stabilize the situation, protect occupants, and get the right roofing professional involved at the right time.
Step 1: Intake the Tenant Report Quickly and Consistently
The first report often comes from a tenant who sees staining, dripping, bubbling paint, a musty smell, or water near a window or ceiling light. Use a consistent intake form so your team gathers the same information every time.
Information to collect from the tenant
- Unit number and location: Room, ceiling area, exterior wall, hallway, stairwell, or shared space.
- Time and weather conditions: Active rain, wind-driven rain, thawing snow, or leak after a storm.
- Visible signs: Drips, ceiling stains, sagging drywall, damp flooring, or water near fixtures.
- Photos or video: Ask for clear images from a safe distance.
- Safety concerns: Electrical proximity, slipping hazards, ceiling bulging, or tenant health concerns.
Good intake notes help a licensed roofing company understand urgency before arriving on site and can also support insurance or owner communication if needed.
Step 2: Classify the Leak by Risk Level
Not every leak has the same urgency. A simple triage category helps your maintenance team decide what happens next.
High-priority roof leak indicators
- Active water entering a unit or common area
- Water near electrical panels, outlets, light fixtures, or appliances
- Ceiling bulging, softened drywall, or falling material
- Multiple tenant reports in the same stack, wing, or building
- Leaks after wind events that may have displaced roofing materials
- Water entering near fire-safety equipment, elevators, or mechanical rooms
When these conditions are present, property managers should consider emergency roof repair coordination and take immediate steps to reduce interior damage while keeping tenants away from unsafe areas.
Lower-priority but still important indicators
- Old stains that are not actively wet
- Minor discoloration with no current dripping
- Isolated dampness after heavy rain
- Reported odor with no visible water source
These still deserve inspection. Small signs can point to roof repair needs, flashing issues, siding problems, or ventilation concerns that may worsen over time.
Step 3: Stabilize the Interior Without Disturbing the Roof
Your onsite response should focus on tenant safety and damage reduction. Avoid sending staff onto the roof unless they are trained, authorized, and properly equipped. Roof surfaces can be slippery, especially in Portland rain.
Interior stabilization checklist
- Move tenant belongings away from the affected area when possible.
- Place containers to collect active dripping where it is safe to do so.
- Keep occupants away from sagging ceilings or wet electrical areas.
- Mark wet flooring or common-area hazards.
- Photograph interior conditions before cleanup begins.
- Notify the owner, asset manager, or HOA board according to your communication policy.
If water is near electricity, follow your property safety protocol and involve the appropriate licensed trade. Roof leak triage should never create additional risk for tenants or staff.
Step 4: Map the Building Clues Before Calling the Roofer
Roof leaks often show up far from the actual source. Water can travel along framing, insulation, pipes, vents, or wall assemblies before appearing inside a unit. Before scheduling service, gather building-level clues that help the roofing contractor inspect efficiently.
Useful details for the roofing appointment
- Roof type, age if known, and prior repair history
- Recent roof installation, roof repair, gutter work, or siding replacement projects
- Locations of roof penetrations, skylights, vents, drains, scuppers, and chimneys
- Whether the leak occurs only during wind-driven rain
- Whether neighboring units or floors are affected
- Photos of the building exterior, roof edge, gutters, and siding near the affected area when safely accessible from the ground
This information can help narrow the inspection path, especially on multi-building properties across the Portland Metro area.
Step 5: Coordinate Professional Roof Inspection and Repair
A qualified contractor can assess roofing materials, flashing, penetrations, drainage, and adjacent exterior components. In many Portland properties, leaks may involve more than shingles. Wall transitions, fiber cement siding details, failed sealant, clogged drainage paths, and aging roof assemblies can all contribute to water intrusion.
For properties with asphalt shingle roofing, the inspection may include shingle condition, exposed fasteners, pipe boots, valleys, ridge details, and flashing. For low-slope sections, the contractor may evaluate seams, drains, ponding areas, membrane condition, and edge metal.
What to request from your contractor
- A clear description of observed conditions
- Photos from the inspection when available
- Recommended repair scope and any access requirements
- Notes on whether additional trades may be needed
- Guidance on whether roof installation or larger capital planning should be considered
For portfolio planning, repeated leak calls can signal the need to evaluate broader roofing materials, drainage improvements, siding repair, or home exterior upgrades across the property.
Step 6: Communicate Clearly With Tenants and Owners
Tenant confidence improves when communication is prompt, direct, and realistic. Avoid overpromising before the inspection is complete. Instead, explain what has been documented, what safety steps are being taken, and when the next update is expected.
Recommended communication points
- Confirm the report was received and logged.
- Provide safety instructions specific to the affected area.
- Share the anticipated inspection or service window when scheduled.
- Explain that the visible leak location may not be the roof entry point.
- Document all updates in the tenant file or property management system.
Owners and boards typically need a concise summary: affected units, urgency level, temporary interior protection steps, inspection status, and recommended next action.
Step 7: Close the Loop After Repairs
Once roof repair work is complete, keep the ticket open long enough to confirm performance through the next rain event when practical. Interior repairs should usually wait until the active leak source is addressed and the area has been evaluated for moisture concerns.
Post-repair checklist
- Save contractor notes, photos, and invoices in the property file.
- Update the unit history with the leak location and repair scope.
- Ask tenants to report any recurring staining or dampness promptly.
- Schedule follow-up inspections for recurring leak zones.
- Review whether preventive maintenance should be added for gutters, roof penetrations, siding transitions, or drainage areas.
A disciplined closeout process helps property managers spot patterns across buildings and budget more accurately for maintenance, siding replacement, or future roof installation work.
Build a Roof Leak Response Plan Before the Next Storm
Portland weather can expose weaknesses in roofs, siding, flashing, and drainage systems. A written triage workflow gives your leasing office, maintenance team, and ownership group a shared process before the next call comes in.
Pdx roofing and siding helps Portland and Portland Metro property managers evaluate roof leaks, plan roof repair, and assess exterior systems with honest guidance. Services and offers are subject to availability and approval. For practical next steps, Get roof installation help and talk with the team about timing, scope, and the right path for your situation.